
Bike carrier
06.05.2026 Read more >

SIA ML-SERVISS Maskavas ielas fil.
Address: Mazjumpravas street 66, Riga, Latvia, LV-1063
Phone: (+371) 66116670
(+371) 29212095
Email: info@mlserviss.lv
WhatsApp (+371) 29212095
SIA ML-SERVISS filiāle "Jugla"
Address: Brivibas gatve street 422, Riga, Latvia, LV-1024
Phone: (+371) 29522111
Email: brivibas@mlserviss.lv
| Product | Code | Price | Number | |
Paklāji salonā auduma KIA SPORTAGE VTextile car mats KIA SPORTAGE V , 2021 Stock: > 1 pcs. 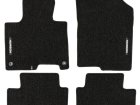 |
HR423992 |
Price: 52.00 € |
|
|
Paklāji salonā auduma KIA CEED IITextile car mats KIA CEED II , 2012-2018 Stock: > 1 pcs. 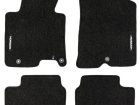 |
HR424005 |
Price: 52.00 € |
|
|
Paklāji salonā auduma JEEP RENEGADETextile car mats JEEP RENEGADE , PHEV , 2014 Stock: 0 pcs. 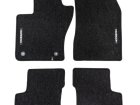 |
HR423985 |
Price: 57.00 € |
|
|
Paklāji salonā auduma HYUNDAI TUCSON IVTextile car mats HYUNDAI TUCSON IV , Stock: > 1 pcs. 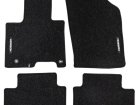 |
HR423978 |
Price: 56.00 € |
|
|
Paklāji salonā auduma HYUNDAI TUCSON IIITextile car mats HYUNDAI TUCSON III , 2015-2020 Stock: > 1 pcs.  |
HR423961 |
Price: 52.00 € |
|
|
Textile car mats HYUNDAI IONIQ 6Stock: 0 pcs. 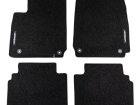 |
HR423954 |
Price: 51.00 € |
|
|
Paklāji salonā auduma HONDA CR-V VITextile car mats HONDA CR-V VI, 2022- Stock: 0 pcs. 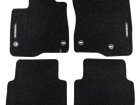 |
HR423947 |
Price: 57.00 € |
|
|
Paklāji salonā auduma FORD Mondeo IVTextile car mats FORD Mondeo IV, 2007-2014 Stock: 0 pcs. 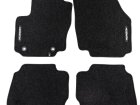 |
HR423923 |
Price: 57.00 € |
|
|
Paklāji salonā auduma FORD GRAND C-MAXTextile car mats FORD GRAND C-MAX, minivan, 2010-2019 Stock: 0 pcs. 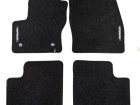 |
HR423916 |
Price: 52.00 € |
|
|
Paklāji salonā auduma FORD FOCUS IIITextile car mats FORD FOCUS III, 2010-2019 Stock: 0 pcs. 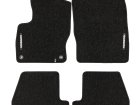 |
HR423909 |
Price: 52.00 € |
|
|
Paklāji salonā auduma FORD FOCUS IITextile car mats FORD FOCUS II, 2004-2011 Stock: 0 pcs. 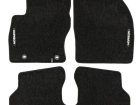 |
HR423893 |
Price: 52.00 € |
|
|
Paklāji salonā auduma FORD FIESTA VITextile car mats FORD FIESTA VI, 2008-2017 Stock: 0 pcs. 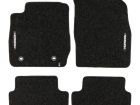 |
HR423930 |
Price: 52.00 € |
|
|
Textile car mats FIAT PANDAStock: 0 pcs. 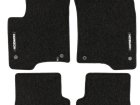 |
HR423855 |
Price: 52.00 € |
|
|
Paklāji salonā auduma FIAT GRANDE PUNTOTextile car mats FIAT GRANDE PUNTO, HB, 2005-2012 Stock: 0 pcs. 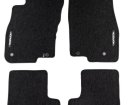 |
HR423862 |
Price: 52.00 € |
|
|
Paklāji salonā auduma FIAT 500 XTextile car mats FIAT 500 X, 2014- Stock: 0 pcs. 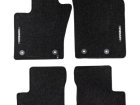 |
HR423886 |
Price: 57.00 € |
|
|
Paklāji salonā auduma FIAT 500/500 CTextile car mats FIAT 500/500 C Stock: 0 pcs. 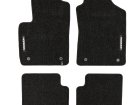 |
HR423879 |
Price: 52.00 € |
|
|
Paklāji salonā auduma DS 4 E-TenseTextile car mats DS 4, HB E-Tense, Electric, 2024- Stock: 0 pcs. 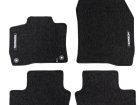 |
HR423831 |
Price: 57.00 € |
|
|
Paklāji salonā auduma DACIA DUSTERextile car mats DACIA DUSTER 2017-2021 Stock: 0 pcs. 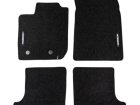 |
HR423848 |
Price: 52.00 € |
|
|
Rezerves ritenisRRKD125/70 R17 5x114.3x67.1 - spare wheel. Stock: 0 pcs. Sorry
Image not available |
RRKD125/70 R17 5x114.3x67.1 |
Price: 225.00 € |
|
|
Paklāji salonā auduma CITROEN E-C4Textile car mats CITROEN E-C4, HB, 2020- Stock: 0 pcs. 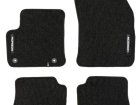 |
HR423817 |
Price: 57.00 € |
|
|
