
Bike carrier
06.05.2026 Read more >

SIA ML-SERVISS Maskavas ielas fil.
Address: Mazjumpravas street 66, Riga, Latvia, LV-1063
Phone: (+371) 66116670
(+371) 29212095
Email: info@mlserviss.lv
WhatsApp (+371) 29212095
SIA ML-SERVISS filiāle "Jugla"
Address: Brivibas gatve street 422, Riga, Latvia, LV-1024
Phone: (+371) 29522111
Email: brivibas@mlserviss.lv
| Product | Code | Price | Number | |
Gaisa atsvaidzinātājs parfimētsPerfume air freshener VIP Stock: > 1 pcs. 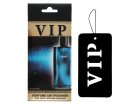 |
V-09997 |
Price: 3.50 € |
|
|
Gaisa atsvaidzinātājs parfimētsPerfume air freshener VIP Stock: > 1 pcs.  |
V-09944 |
Price: 3.50 € |
|
|
Auto sakabes āķis MERCEDES EQB (X243) 2022-VERTICAL DETACHABLE TOWBAR Stock: 0 pcs. 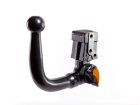 |
H4135AV |
Price: 470.00 € |
|
|
Sakabes āķa vāciņšCap for the tow bar, black, rubber. Stock: > 1 pcs.  |
kolp.86907 |
Price: 5.00 € |
|
|
Kopšanas līdzeklis plastmasas virsmāmAn effective preparation that removes all dirt from surfaces made of plastic, artificial leather, linoleum. Perfect for washing plastic elements of the car cockpit, as well as window frames or office equipment. Stock: 0 pcs. 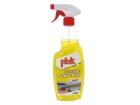 |
00201 |
Price: 5.00 € |
|
|
Riepu spīdums TITANIUMTire shine TITANIUM DM406. Stock: > 1 pcs. 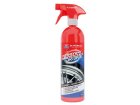 |
DM406 |
Price: 5.00 € |
|
|
Sakabes āķa vāciņšCap for the tow bar, chrome. Stock: > 1 pcs. 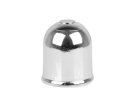 |
kolp.86905 |
Price: 5.00 € |
|
|
Jumta reliņi CITRORN BERLINGO,PEUGEOT RIFTER,OPEL COMBO,TOYOTA PROACE CITYRoof rails, code 5732930LB Stock: > 1 pcs. 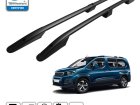 |
5732930LB |
Price: 200.00 € |
|
|
Auto sakabes āķis SKODA KODIAQVERTICAL DETACHABLE TOWBAR. Stock: > 1 pcs. 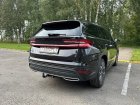 |
H 38V |
Price: 365.00 € |
|
|
Auto sakabes āķis SKODA KODIAQWe do not install original programming wires on this car Stock: > 1 pcs. 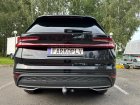 |
H 38 |
Price: 195.00 € |
|
|
Panel care agentStock: 0 pcs. 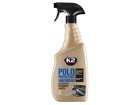 |
K2-01521 |
Price: 6.00 € |
|
|
Šampūns ar vaskuShampoo with wax, concentrate, 1L Stock: > 1 pcs. 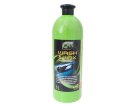 |
00651 |
Price: 5.00 € |
|
|
Sānu griešanas knaiblesSide cutting pliers 58749. Precise work and quality materials ensure a long service life of the pliers. The blades are designed to cut soft and hard wire. The thin head allows you to work in hard-to-reach places. The handle is made of materials that increase comfort. Length 160 mm. Stock: > 1 pcs. 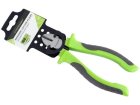 |
58749 |
Price: 5.00 € |
|
|
Car moisture absorberStock: 0 pcs. 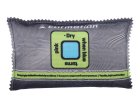 |
86714 |
Price: 9.00 € |
|
|
Front bar DODGE RAMCode RAM1500-R1976-03-B Stock: 0 pcs. 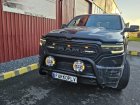 |
RAM1500-R1976-03-B |
Price: 485.00 € |
|
|
Thule uzstādīšanas komplektsMounting kit for attaching a Thule roof rack to vehicles without pre-installed roof rack attachment points or factory installed frames. Stock: 0 pcs. 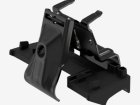 |
69-186008 |
Price: 45.00 € |
|
|
Piekabes sānu bortu eņģeSide hinge with shackle. Stock: 0 pcs. 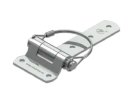 |
7617-R |
Price: 6.00 € |
|
|
Stiprinājuma cilpa piekabes tentamFixing loop for the awning Stock: > 1 pcs. 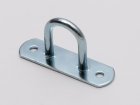 |
3421 |
Price: 4.00 € |
|
|
Trose piekabes tentamTrailer awning rope. Stock: 0 pcs. 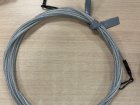 |
10636 |
Price: 35.00 € |
|
|
Rezerves ritenisSpare wheel RR5x112x66,5175/70r20. Stock: 0 pcs. 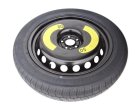 |
RR5x112x66.5175/70r20 |
Price: 245.00 € |
|
|
