
Bike carrier
06.05.2026 Read more >

SIA ML-SERVISS Maskavas ielas fil.
Address: Mazjumpravas street 66, Riga, Latvia, LV-1063
Phone: (+371) 66116670
(+371) 29212095
Email: info@mlserviss.lv
WhatsApp (+371) 29212095
SIA ML-SERVISS filiāle "Jugla"
Address: Brivibas gatve street 422, Riga, Latvia, LV-1024
Phone: (+371) 29522111
Email: brivibas@mlserviss.lv
| Product | Code | Price | Number | |
Paklāji salonā gumijas VW TIGUANCompatible with Volkswagen Tiguan after 2024, petrol and diesel, not compatible with Mild Hybrid, 4 pieces, black Stock: > 1 pcs. 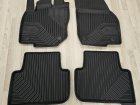 |
RPF77431553 |
Price: 50.00 € |
|
|
Piekabes āķa galsSpecial hook used for towbars of the American type. Stock: 0 pcs.  |
AH-MB3C-19D521-GB |
Price: 155.00 € |
|
|
Auto sakabes āķisTow bar with screw fixation. Tow bar constructed accordingly all European and car producer standards. Installs accordingly car producer mounting places. Kit contains all necessary parts for installation. Stock: 0 pcs. 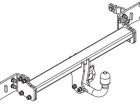 |
D 67 |
Price: 198.00 € |
|
|
Auto sakabes āķisSemi-automatic towbar Stock: 0 pcs. 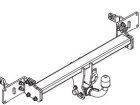 |
D 67A |
Price: 259.00 € |
|
|
Auto sakabes āķisVERTICAL DETACHABLE TOWBAR Stock: 0 pcs. 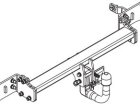 |
D 67V |
Price: 399.00 € |
|
|
Auto sakabes āķis MG HSVERTICAL DETACHABLE TOWBAR Stock: 0 pcs. 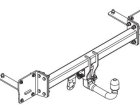 |
MG 02V |
Price: 359.00 € |
|
|
Auto sakabes āķis MG HSSemi-automatic towbar Stock: 0 pcs. 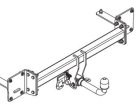 |
MG 02A |
Price: 239.00 € |
|
|
Auto sakabes āķis MG HSTow bar with screw fixation. Tow bar constructed accordingly all European and car producer standards. Installs accordingly car producer mounting places. Kit contains all necessary parts for installation. Stock: 0 pcs. 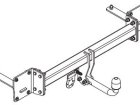 |
MG 02 |
Price: 189.00 € |
|
|
Auto sakabes āķis DACIA DUSTER / RENAULT DUSTERVERTICAL DETACHABLE TOWBAR Stock: > 1 pcs.  |
G 105V |
Price: 328.00 € |
|
|
Auto sakabes āķis DACIA DUSTER / RENAULT DUSTERSemi-automatic towbar Stock: > 1 pcs. 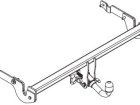 |
G 105A |
Price: 209.00 € |
|
|
Auto sakabes āķis DACIA DUSTER / RENAULT DUSTERTow bar with screw fixation. Tow bar constructed accordingly all European and car producer standards. Installs accordingly car producer mounting places. Kit contains all necessary parts for installation. Stock: > 1 pcs.  |
G 105 |
Price: 169.00 € |
|
|
Wind deflectors Volvo XC90Stock: > 1 pcs. 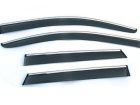 |
BVLXC90323-W/S |
Price: 85.00 € |
|
|
Mazgāšanas sūklisSoft microfiber, mesh and fine chenille sponge, 23x12x6 cm Stock: > 1 pcs.  |
83110 |
Price: 5.00 € |
|
|
TējkannaThe kettle is powered by 24V direct current (DC) and is intended for use in vehicles, boats and camping. It can be connected to DIN and EURO sockets. Before use, make sure that the power output of the electrical outlet is suitable for the kettle. Use: 1. Fill the kettle with water between the MIN and MAX marks. 2. Plug the kettle into your vehicle's socket and turn it on. 3. After the water is boiled, the kettle will turn off automatically. 4. Make sure the appliance is cool before storing it. Important! When you do not use the kettle for a long time, it is recommended to clean it with a damp cloth and dry it. In case of damage, consult a professional service for repair. If a fuse blows, replace it with another of the same rating. 1. Do not turn on the kettle without water! 2. Avoid using near flammable liquids or gases! 3. Do not use the device if any part is damaged! 4. Never leave the kettle unattended when it is switched on! 5. Keep it away from children and pets! Always be careful when children or pets are near the kettle, especially when the water inside is hot! Technical specifications: Capacity: 500ml. Voltage: 12-24V DC. Fuse: 20A. Amperage: 11A. Power: 150-200W. Dimensions: 16.5 x 15 x 18.5 cm. Weight: 567gr. Stock: > 1 pcs.  |
83001 |
Price: 22.00 € |
|
|
Mobīlā telefona turētājsWAYME Gravity Air Inlet Holder, Graphite Stock: > 1 pcs. 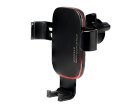 |
63069RD |
Price: 8.00 € |
|
|
Mobīlā telefona turētājsWAYME Gravity Air Inlet Bracket, Red Stock: 0 pcs. 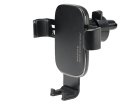 |
63069GR |
Price: 8.00 € |
|
|
Mobīlā telefona turētājsPractical and solid suction cup mount. Allows you to change the length and inclination of the arm and multi-angle adjustment with a rotating ball. Gravity locking and unlocking - one-handed operation. Stock: > 1 pcs. 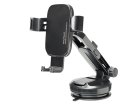 |
63068GR |
Price: 10.00 € |
|
|
Mobīlā telefona turētājsPractical and solid phone holder mounted on the air intake grille. Allows multi-angle adjustment with a rotating ball. Automatic gravity locking and unlocking - one-handed operation. The holder is equipped with a USB C port, enabling inductive charging of the phone. Stock: > 1 pcs. 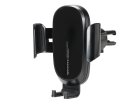 |
63066 |
Price: 17.00 € |
|
|
Mobīlā telefona turētājsGravity holder with wireless charger. Suction cup mount. Allows to change the length and inclination of the arm and multi-angle adjustment of the rotating ball. Gravity locking and unlocking - one-handed operation. Stock: > 1 pcs. 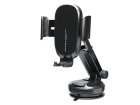 |
63065 |
Price: 15.00 € |
|
|
Antena20 cm braided antenna mast, 5 mm thread Stock: > 1 pcs. 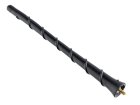 |
58541 |
Price: 7.00 € |
|
|
