
Bike carrier
06.05.2026 Read more >

SIA ML-SERVISS Maskavas ielas fil.
Address: Mazjumpravas street 66, Riga, Latvia, LV-1063
Phone: (+371) 66116670
(+371) 29212095
Email: info@mlserviss.lv
WhatsApp (+371) 29212095
SIA ML-SERVISS filiāle "Jugla"
Address: Brivibas gatve street 422, Riga, Latvia, LV-1024
Phone: (+371) 29522111
Email: brivibas@mlserviss.lv
| Product | Code | Price | Number | |
Kartera aizsargs FORD C-MAX /FOCUS C-MAX/ GRAND C-MAX/FOCUS/KUGA, Renault MEGANE, Volvo C30/C70OE No.: 1382964, 1472046, 1523504, 1682803, 3M51-R6P013-CU Stock: 0 pcs. 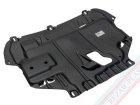 |
RP150920 |
Price: 46.00 € |
|
|
Paklāji salonā gumijas VOLVO EX30Interior rubber mats Rezaw-Plast - especial made rubber mats for each model using 3D floor scan technology. Stock: > 1 pcs.  |
RP200419 |
Price: 53.00 € |
|
|
Paklāji salonā gumijas FORTHING U-TOURInterior rubber mats Rezaw-Plast - especial made rubber mats for each model using 3D floor scan technology. Stock: 0 pcs. 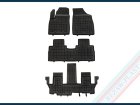 |
RP205602 |
Price: 100.00 € |
|
|
Paklāji salonā gumijas FORTHING T5 EVOInterior rubber mats Rezaw-Plast - especial made rubber mats for each model using 3D floor scan technology. Stock: 0 pcs. 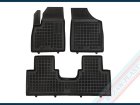 |
RP205601 |
Price: 61.00 € |
|
|
Paklāji salonā gumijas BYD SEAL U DM-iInterior rubber mats Rezaw-Plast - especial made rubber mats for each model using 3D floor scan technology. Stock: > 1 pcs. 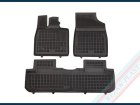 |
RP205303 |
Price: 61.00 € |
|
|
Paklāji salonā gumijas BYD SEAL ElectricInterior rubber mats Rezaw-Plast - especial made rubber mats for each model using 3D floor scan technology. Stock: 0 pcs. 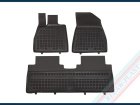 |
RP205302 |
Price: 61.00 € |
|
|
Paklājs bagāžniekā SKODA KODIAQApproximate product dimensions (cm):51 x 100 Stock: 0 pcs. 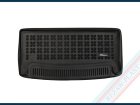 |
BPR231551 |
Price: 43.00 € |
|
|
Paklājs bagāžniekā OMODA 5Approximate product dimensions (cm):87 x 86/94,5. Stock: 0 pcs. 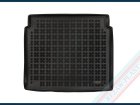 |
BPR234902 |
Price: 48.00 € |
|
|
Paklājs bagāžniekā SKODA KODIAQ IIApproximate product dimensions (cm): 54 x 101. Stock: 0 pcs. 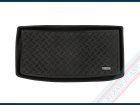 |
BP101551R |
Price: 38.00 € |
|
|
Paklājs bagāžniekā MINI COOPER EApproximate product dimensions (cm): 47 x 97. Stock: 0 pcs.  |
BP104201R |
Price: 38.00 € |
|
|
Paklājs bagāžniekā CUPRA TERRAMARApproximate product dimensions (cm): 91 x 102 Stock: 0 pcs.  |
BP104105R |
Price: 46.00 € |
|
|
Paklājs bagāžniekā CUPRA TAVASCANApproximate product dimensions (cm): 95 x 107 Stock: 0 pcs. 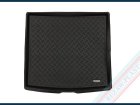 |
BP104104R |
Price: 46.00 € |
|
|
Paklājs bagāžniekā CUPRA LEON SportstourerApproximate product dimensions (cm): 105 x 103 Stock: 0 pcs. 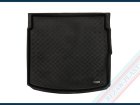 |
BP104106R |
Price: 46.00 € |
|
|
Paklājs bagāžniekā CUPRA LEONApproximate product dimensions (cm): 78 x 104 Stock: 0 pcs. 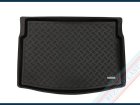 |
BP104103R |
Price: 41.00 € |
|
|
Paklājs bagāžniekā BMW i5(G61)Approximate product dimensions (cm): 107 x 136 Stock: 0 pcs. 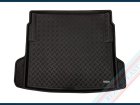 |
BP102174R |
Price: 48.00 € |
|
|
Auto sakabes āķis LANDROVER DEFENDERVERTICAL DETACHABLE TOWBAR Stock: 0 pcs. 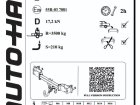 |
LN 08V |
Price: 490.00 € |
|
|
Tow bar LANDROVER DEFENDERTow bar with screw fixation. Tow bar constructed accordingly all European and car producer standards. Installs accordingly car producer mounting places. Kit contains all necessary parts for installation. Stock: 0 pcs. 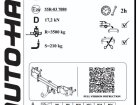 |
LN 08 |
Price: 310.00 € |
|
|
Spainis automašīnu mazgāšanaiCode 17020+17022 - professional washing bucket K2 'WASH' with a dirt separator, 20 liters capacity. Stock: 0 pcs.  |
17020+17022 |
Price: 12.00 € |
|
|
Auto sakabes āķis Landrover Defender 110 (LWB)Landrover Defender 110 (LWB) 1998- Stock: 0 pcs.  |
1196 |
Price: 528.00 € |
|
|
Tow bar Mercedes Benz GLC Coupe (C253)Tow bar with screw fixation. Tow bar constructed accordingly all European and car producer standards. Installs accordingly car producer mounting places. Kit contains all necessary parts for installation. Stock: 0 pcs. 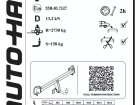 |
D 70 |
Price: 189.00 € |
|
|
